 Allow me to take you inside my small independent shop and walk you through a typical print process.
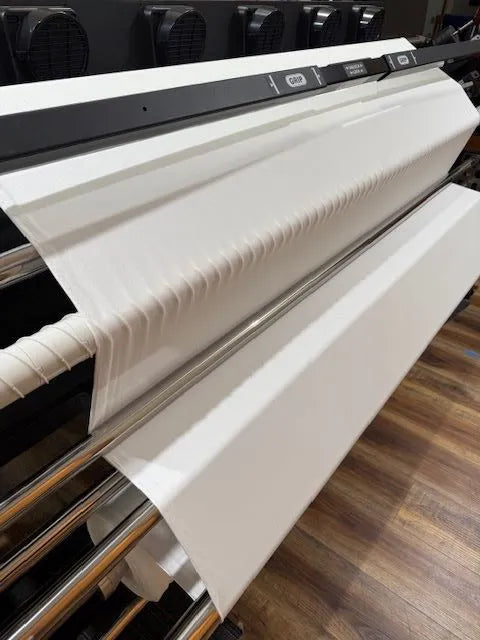
Step 1. Loading the Printer

Step 2: Calibrate the Machine
After the fabric is laced up and ready to print, I check the print heads to ensure they aren't clogged and calibrate the machine to align the dots to ensure the print comes out beautifully!
You might be wondering what I mean by aligning the dots. This printer sprays tiny dots onto the fabric to create the image you see at the end. It has no color limitations like screen printing and should print a consistent color from one batch to the next because it pulls the color code that is imbedded into the file and prints that exact color code.
This isn't infallible as sometimes the color of the base fabric changes from batch to batch, so you might experience color differences from order to order.
Step 3: Setting the Fabric Width
After the fabric is properly installed on the machine, I set the print parameters (width of the fabric to print). Each fabric base is a different width, so this is done manually. Once that is complete, it's time to print!

Step 4: Printing to Order
I print to order, so I don't print it unless someone has ordered it. I load each individual design into our software and print one base fabric at a time. I always start with knit fabrics and then move to the woven/non-stretch fabrics. This machine has a sticky belt that keeps the fabric flat to prevent stretching or moving during the printing process.
There are a few things that can go wrong in the printing process, and I'll share a couple with you here:
Print head or belt malfunctions can cause misprints.
A misprint is a print that we don't send to the customer but sell later with a deep discount and understanding that there is a flaw in the fabric. If you want to know more about our misprint policy, you can see our Refund policy – WayMaker Fabrics
Step 5: Heat Press
Once the fabric comes off the printer, it goes over to the heat press. ALL of our fabrics are heat pressed.
This either:
A. Transfers the ink from the clay paper to the fabric during the sublimation process for the poly fabrics, or
B. Heat set the ink into the fabric on our natural fibers.
Different fabrics require different temperatures and speeds to go through the heat press.
If you ever notice a bit of ink transfer on the back of your fabric, it’s because the wet fabric rolls up as it comes off the printer. The ink remains wet until it goes through the heat press, where it’s fully dried and set
Step 6: Cutting, Packing and Shipping

Once the fabric is pressed and dry, it moves to the cut room. That’s where we:
1. Cut each order
2. Inspect for flaws
3. Lovingly separate and pack it
4. Write a handwritten thank-you note
5. Ship it to you
When your package arrives, I hope it inspires you to make something beautiful. And if you do, I’d love for you to share it in our Facebook group so we can all admire your creativity!


0 comments